


What is it, and what does it require?
Raptor is a complete SaaS that personalizes and makes recommendations on various platforms – including web and email. You can use Raptor to create behavior-based triggers.
Personalized and relevant newsletters and automated messages with dynamic content increase customer loyalty, CTR, conversion rate, upsell, and revenue.
It is beneficial to target your campaigns and become more precise in your execution by using Raptor’s intelligent triggers. Raptor makes it possible to make intelligent segmentations of your subscribers, so your customers receive content they find relevant (based on their behavior).
Setting up Raptor
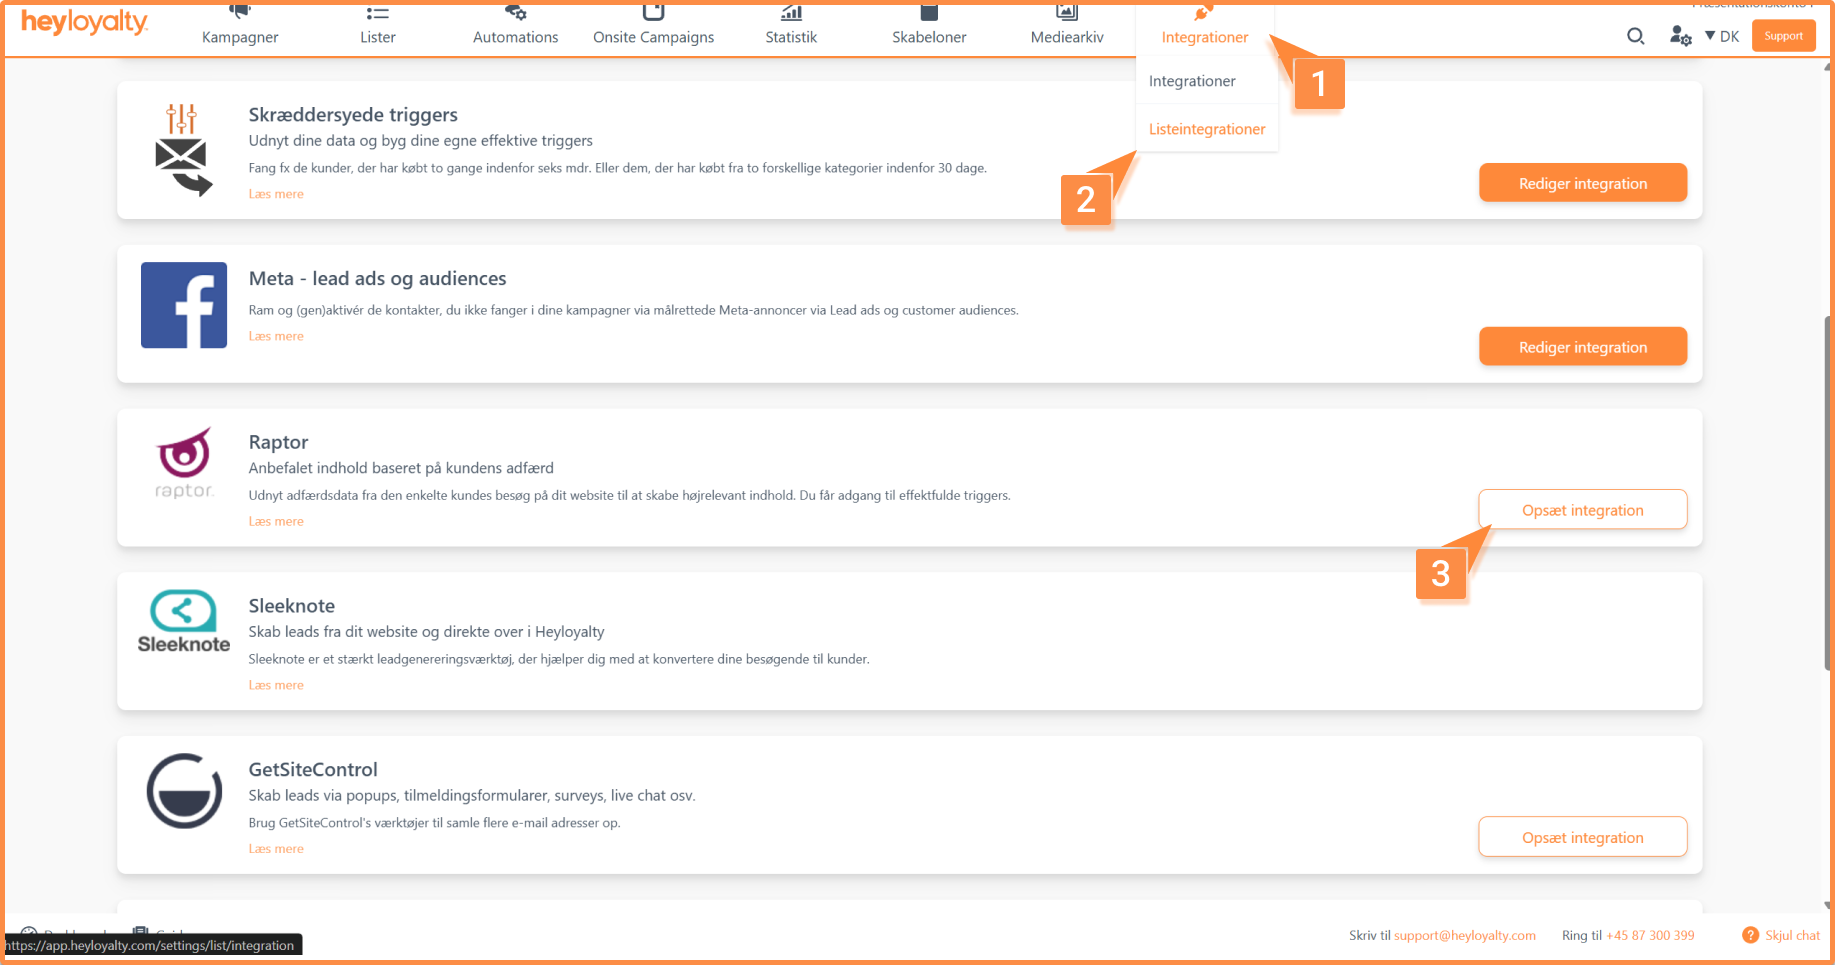
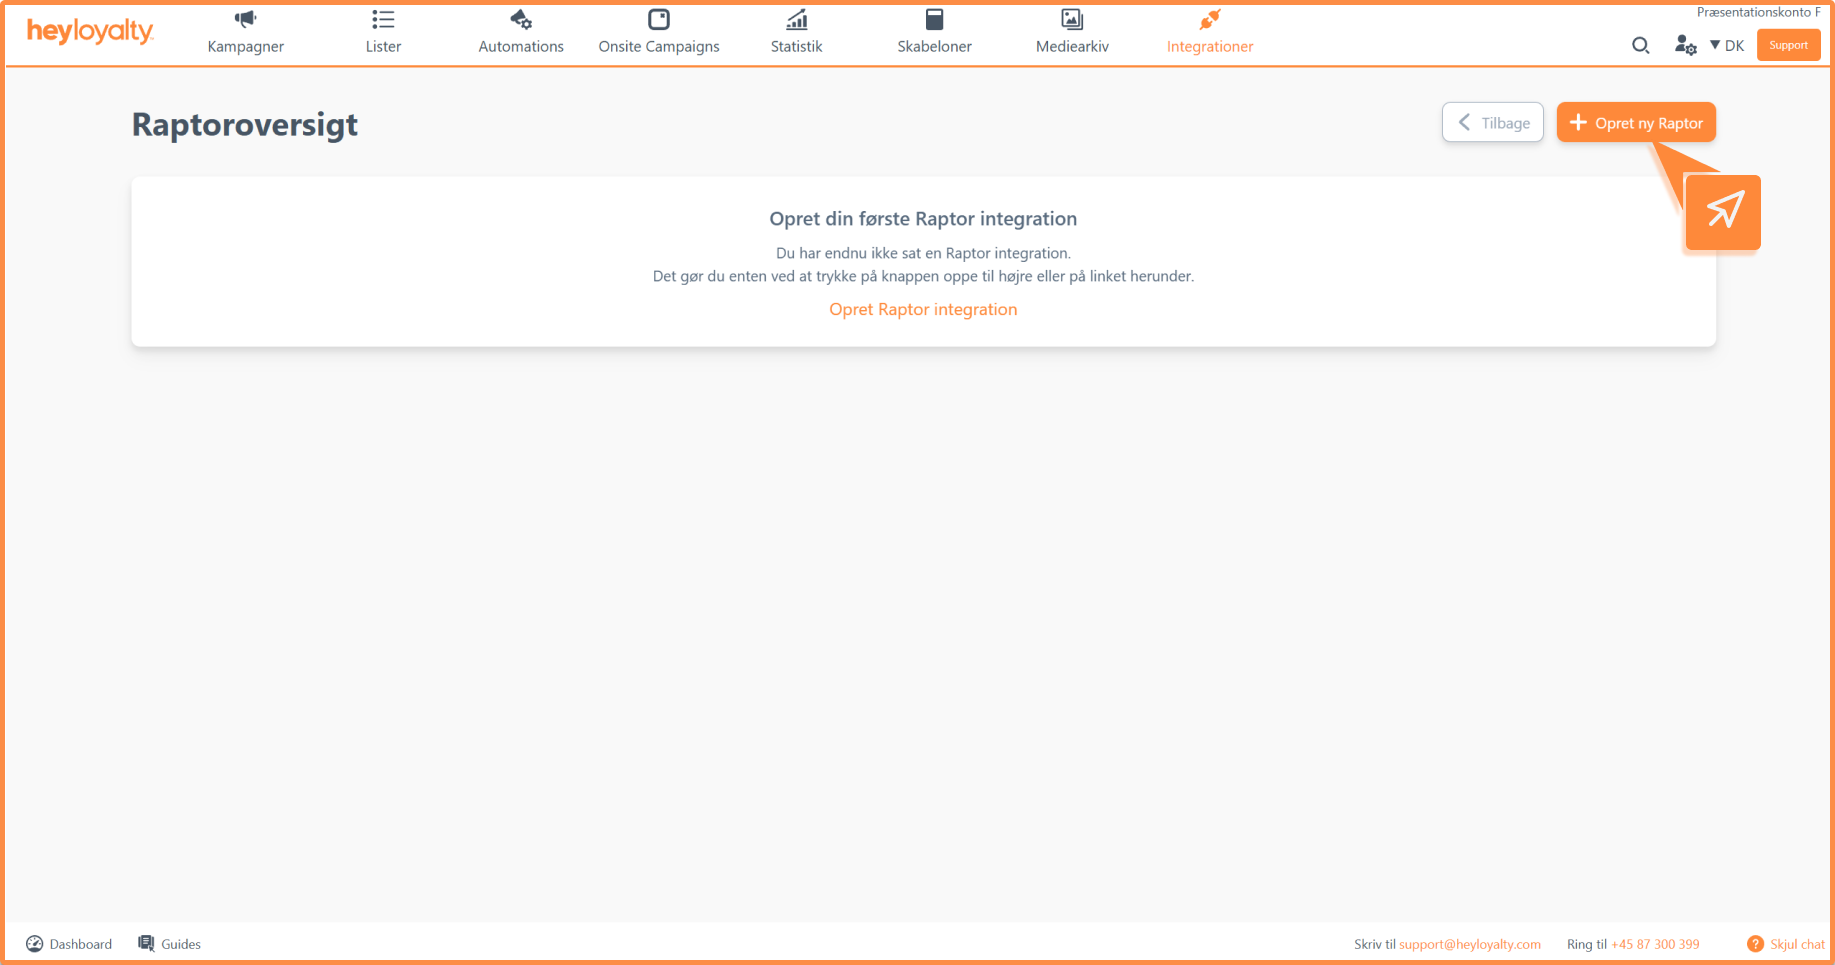
Setup Raptor by clicking on Integrations –> List integrations –> Raptor –> Setup integration –> Create new Raptor
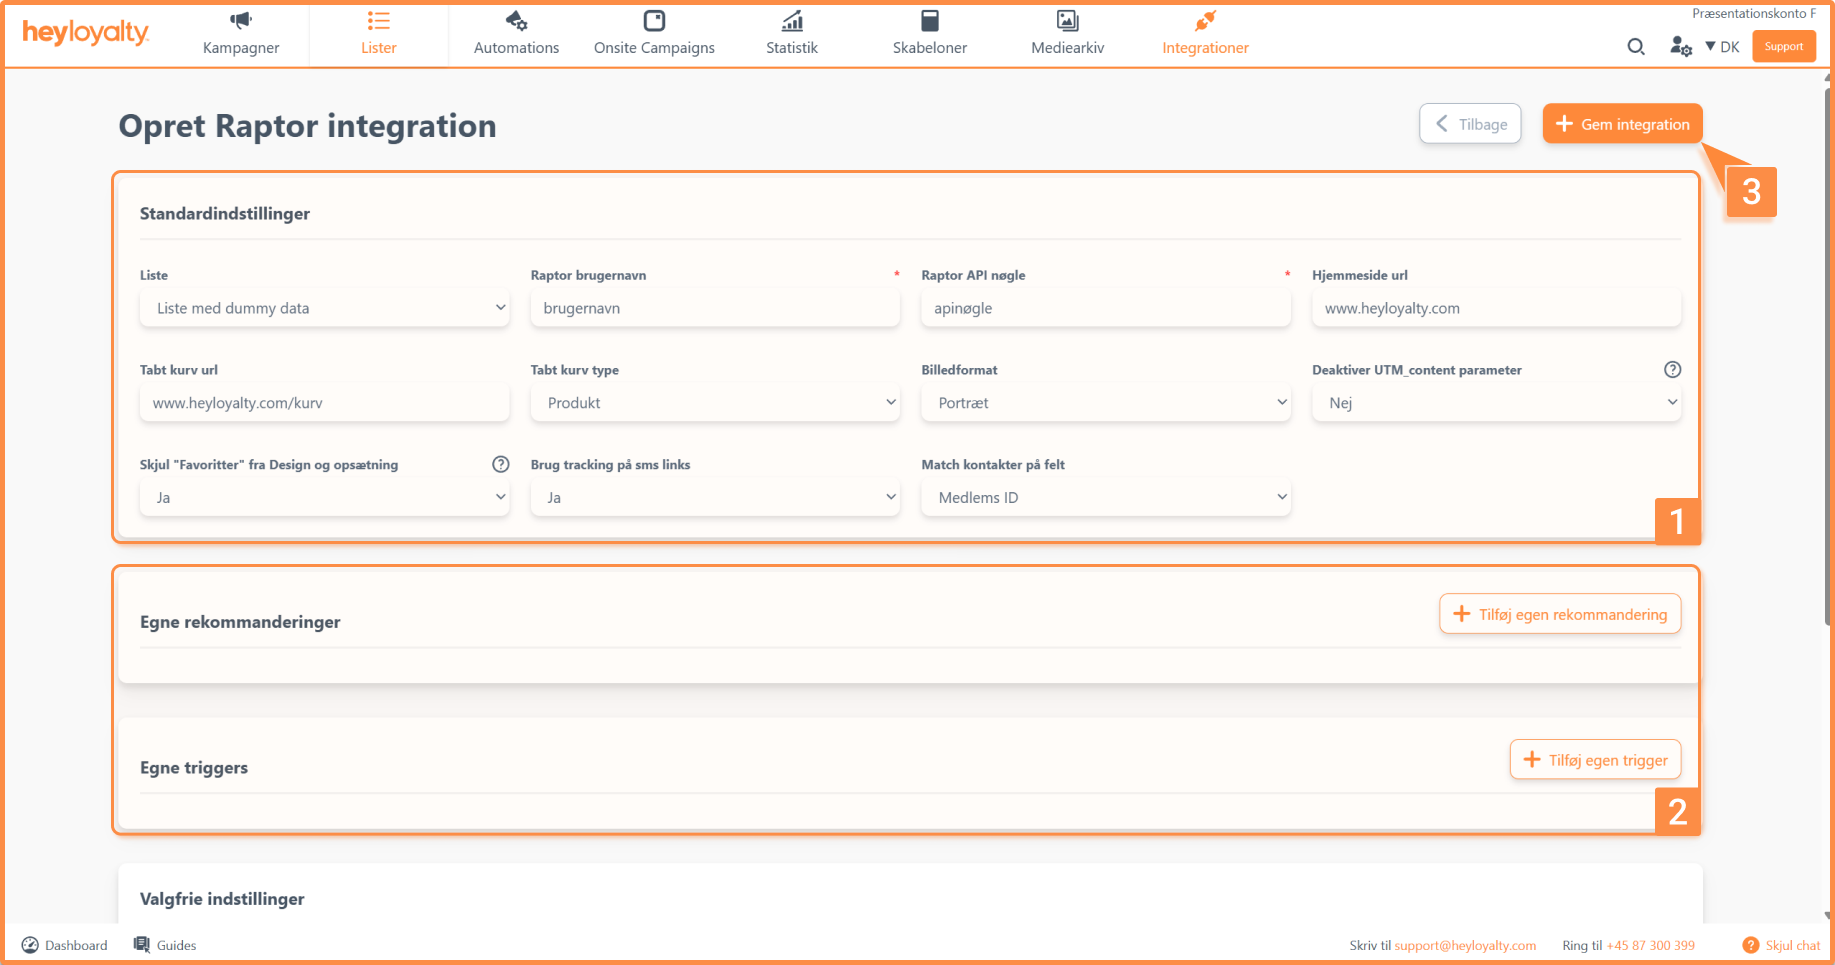
Fill in the fields.
You can find your Raptor username and Raptor API key by logging in to Raptor.
You can add custom recommendations and custom triggers. Heyloyalty finds it difficult to provide guidance on this, as the specific recommendations and triggers you want to create—as well as how to set them up—vary from person to person. If you have the data available in Raptor, please contact Heyloyalty’s support team if you need help.
You should only change the pre-filled fields if you know that the setup on your website and in Raptor is different. For most people, it will work if you leave it as the standard.
Finish with Save integration.
Use Raptor in your newsletters
Once you’ve set up a Raptor integration, you’ll be able to use a Raptor block, which you can insert into your newsletter in Step 2.
When you drag a Raptor block into your newsletter, you’ll see an option on the right side of Step 2 to configure the following settings:
- Products per row: Choose how many products to display in each row. You can choose between 1 and 4 products. Keep in mind that the number of products must match your product feed template.
- Number of rows: Select how many rows of products to display in your newsletter.
- Template: Select the product feed template that matches your Raptor product feed.Design button: Here you can customize the layout of your Raptor product feed.
- Styling: Here you can define CSS styling for your feed’s layout.
Select content type
Under “Content Type,” it’s important to select the correct recommendation type. Below, you can see what product recommendations each type provides:
- Personalized product recommendations: Displays personalized product recommendations based on an overall picture of the user’s behavior.
- Popular Products: Shows the products that have been purchased the most times on your online store.
- Recently Viewed Products: Displays the products the user has most recently viewed on your online store.
- Popular products in this category: Select the ID of the category from which you want to view the most purchased products.
- Popular Products by Brand: Select the ID of the brand for which you want to view the best-selling products.
- Most Viewed Products in a Category: Select the ID of the category from which you want to view the most viewed products.
- Personalized Recommendations Based on Recent Shopping Cart Items: Displays products based on the items the user most recently added to their shopping cart.
- Products on Sale: Shows only products that are on sale.
Filter the products displayed
Once you’ve selected a content type, you can filter which products to display. You can choose between ” All Products,” ” Show products with sale prices first,” and ” Show products without sale prices first.”
You also have the option to specify a parameter name if you want to define more specifically which products should be displayed. Here, you select the parameter value by which the feed should be filtered.

Hvis du mangler information eller hjælp, som du ikke finder her på guide sitet, er du altid velkommen til at kontakte vores support!
support@heyloyalty.com / tlf. 87 300 399