
Zapier makes it possible to connect Heyloyalty with other systems so you can automate tasks across platforms.
In this guide you will learn how to activate the Zapier integration in Heyloyalty, connect it to your Zapier account and get your first Zap ready to use.
Example of using the Zapier integration
You can use Zapier to automatically send new leads from a form to a list in Heyloyalty.
An example could be:
- A person fills out a form in your lead system
- Zapier registers the new contact
- Zapier sends email, name and relevant fields to Heyloyalty
- The member is automatically created in the selected list
- Heyloyalty can then use the member in segmentation, flows or campaigns
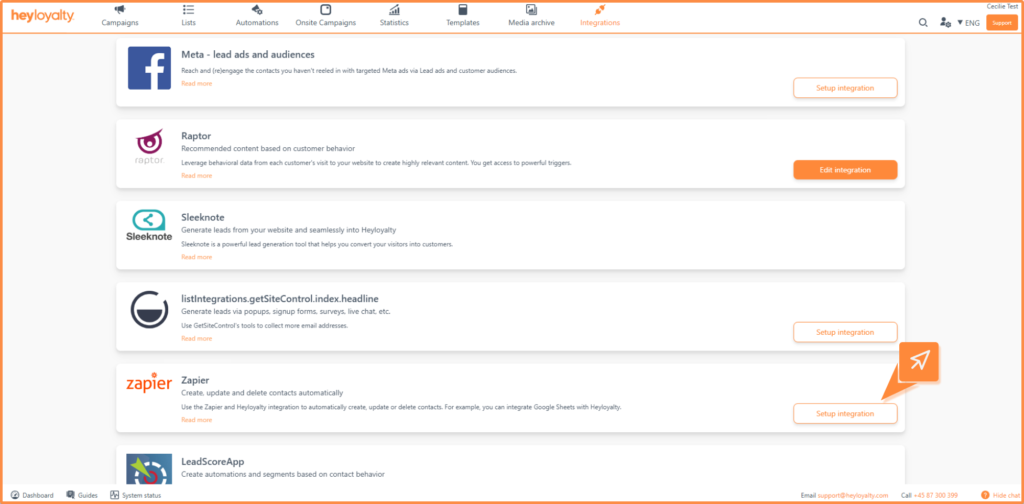
Step 1: Open list integrations in Heyloyalty
Start in Heyloyalty, where the integration must first be activated on the list you want to use. Go to List integrations and find Zapier in the overview.
Click Set up integration next to Zapier.
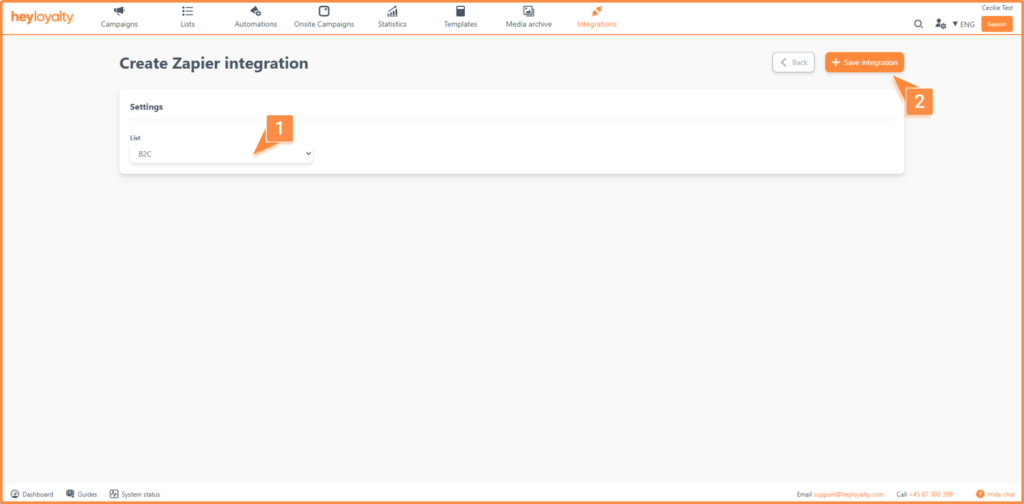
Step 2: Create a new Zapier integration
When you are on the Zapier overview in Heyloyalty, click Create new Zapier.
On the integration page, select the list you want the integration to connect to. Use the list to control which members Zapier can work with. Click Save integration when you have selected the list.
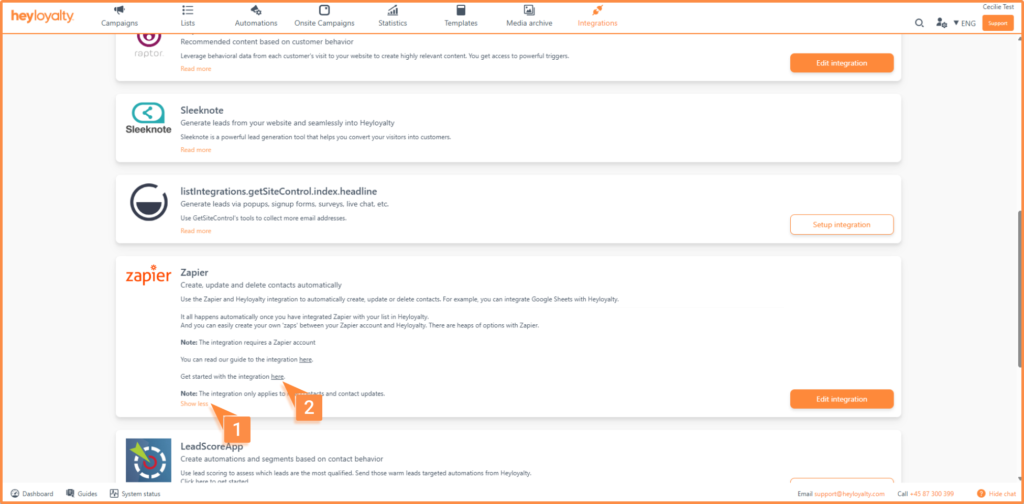
Step 3: Proceed to Zapier
Once the integration is saved in Heyloyalty, go back to the List integrations overview. Open the Zapier integration text and click the link that will send you to Zapier. The link is called: Get started with the integration here and can be found here:
Click Accept Invite & Build a Zap if Zapier asks you to accept the invitation.
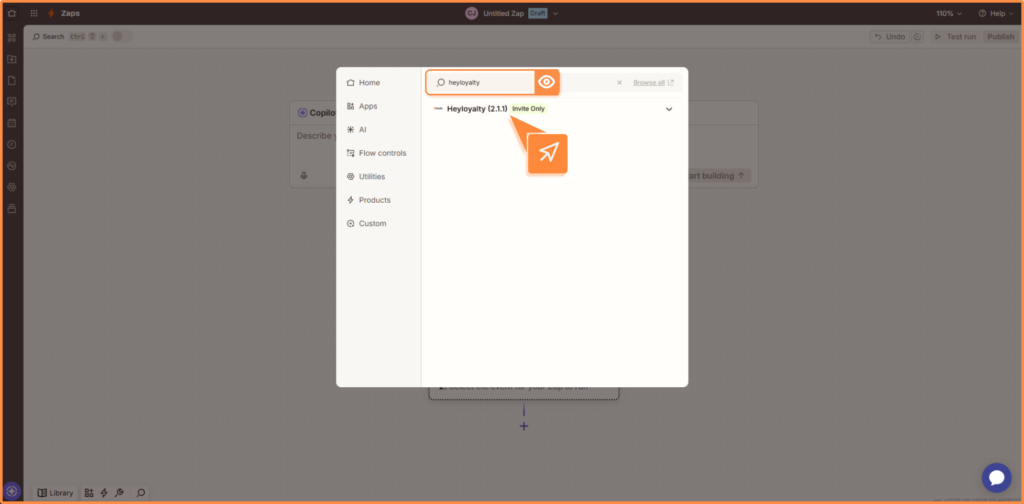
Step 4: Set up zap in Zapier
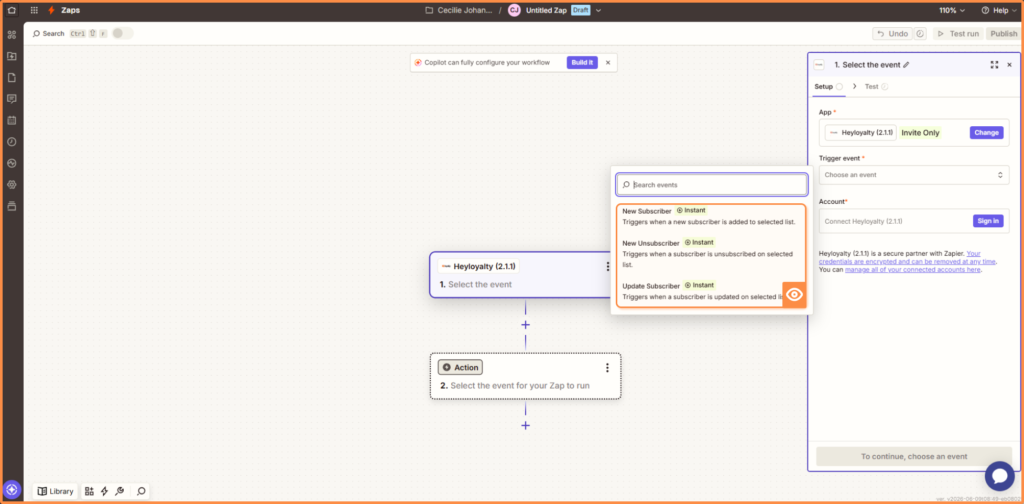
In Zapier, you need to create a zap. Here you press trigger and search for Heyloyalty as an app.
Next, you need to choose which event the zap should trigger on. You can typically choose between actions such as: Create contact, Update contact and Delete contact.
After selecting the action in Zapier, connect your Heyloyalty account. Click Sign in or Connect account in Zapier.
Zapier will now open a window where you need to insert your API information from Heyloyalty.
To find the information in Heyloyalty, go to the account icon in the top right corner and select Account details.
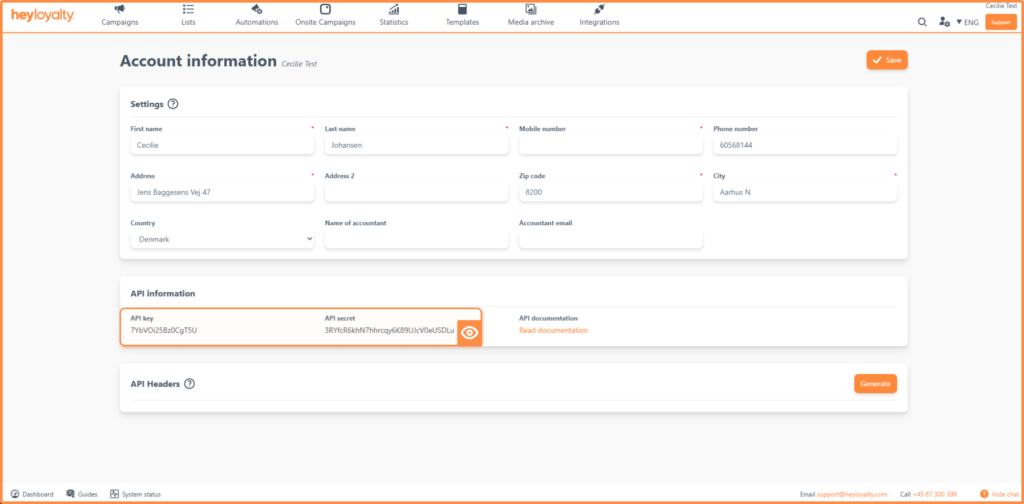
Here you need to insert the API key and API secret information in Zapier, and finally press Continue.
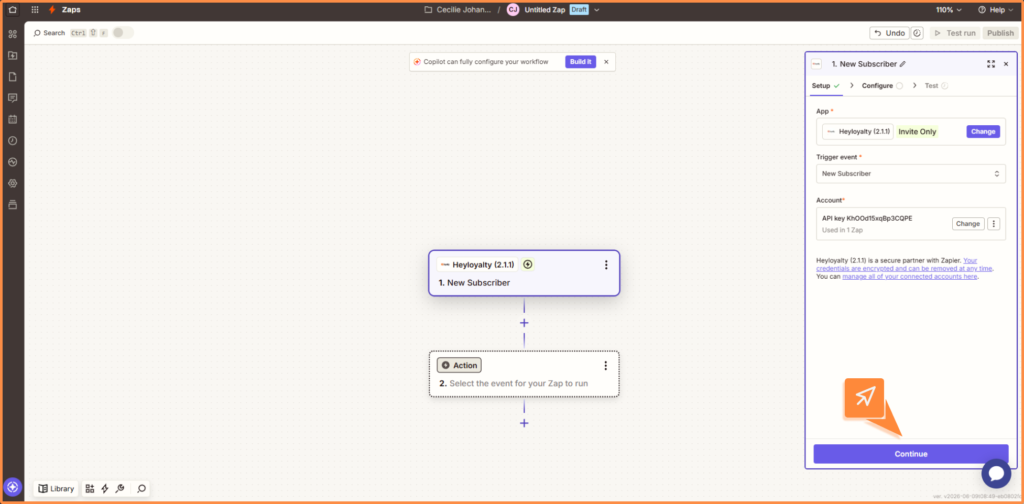
Once the account is connected, select the list you want your Zap to use and press Continue.
Now you’re ready to test the integration. For example, if you have selected the Create contact event, go in and create a contact in the Heyloyalty list and then you can go back to Zapier and test if Zapier finds the contact. Once you have completed a successful test, you can go ahead and create a record.
Get started with the Zapier integration
You have now set up the Zapier integration between Heyloyalty and Zapier. You have activated the integration on a list, connected your Zapier account with Heyloyalty, selected an action, matched fields and tested the connection.
Once your Zap is activated, you can use Zapier to automate working with contacts and data across your systems.