
With an A/B split test, you can test different versions of your campaign against each other and find out what works best with your recipients. You can split test by subject line, content, sender and send time.
In this guide, you’ll learn what an A/B split test is and how to set it up in Heyloyalty.
What is an A/B split test?
In an A/B split test, you compare two different versions of the same campaign by splitting the traffic equally between them. A small portion of your recipients get version A, another small portion gets version B, and the version that performs best is automatically or manually sent out to the remaining recipients.
That way, you make your decisions based on data – not gut feelings.
Step 1: Enable A/B split testing
When you create your campaign, in Step 1, select AB split test campaign under Broadcast type.
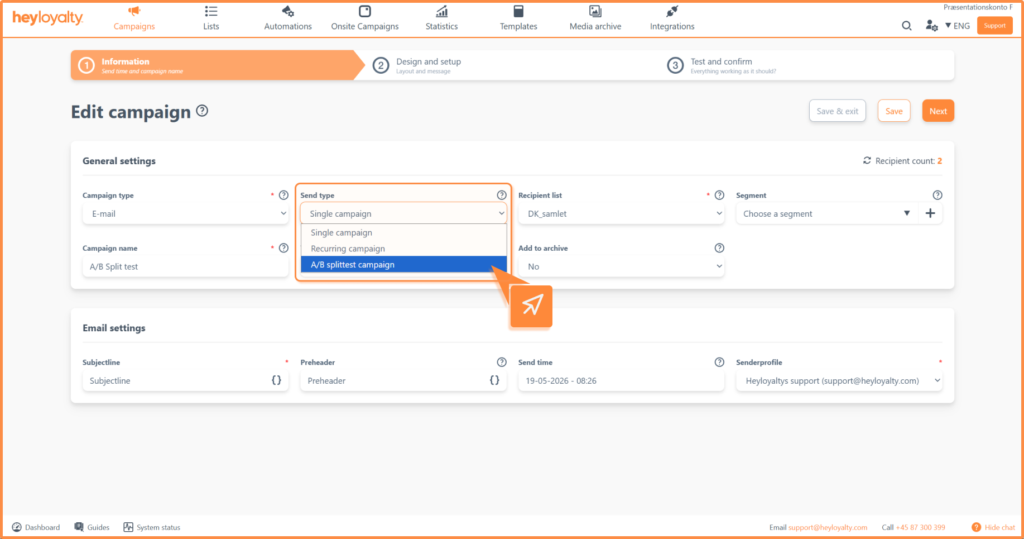
Otherwise, choose a List and an internal campaign name.
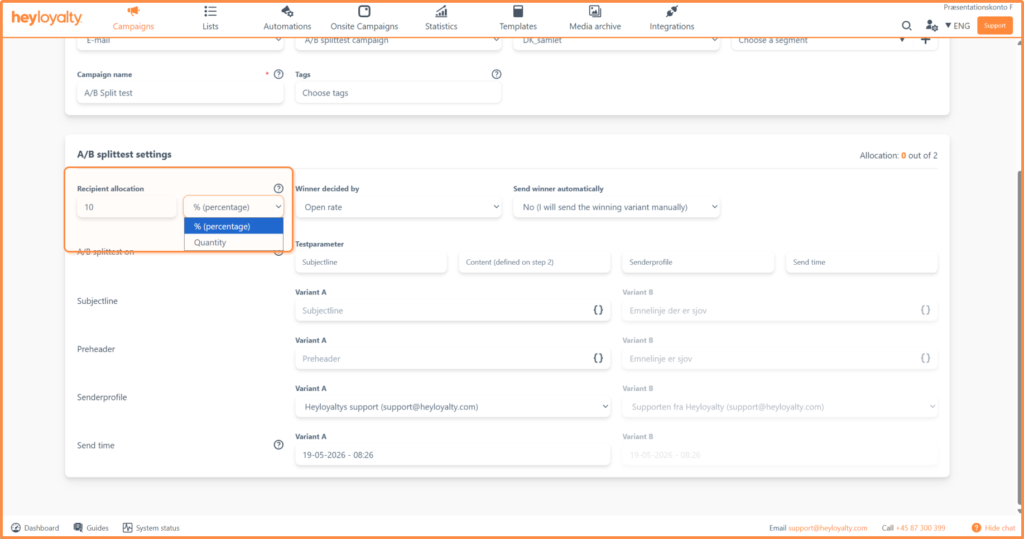
Step 2: Set up A/B split testing
Under A/B split test settings, you decide how many of your recipients should be included in the actual test. You can choose either a percentage or a specific number of recipients.
For example, if you enter 10% in the field, you will receive:
- 5% version A
- 5% version B
The remaining 90% receive the winning version.
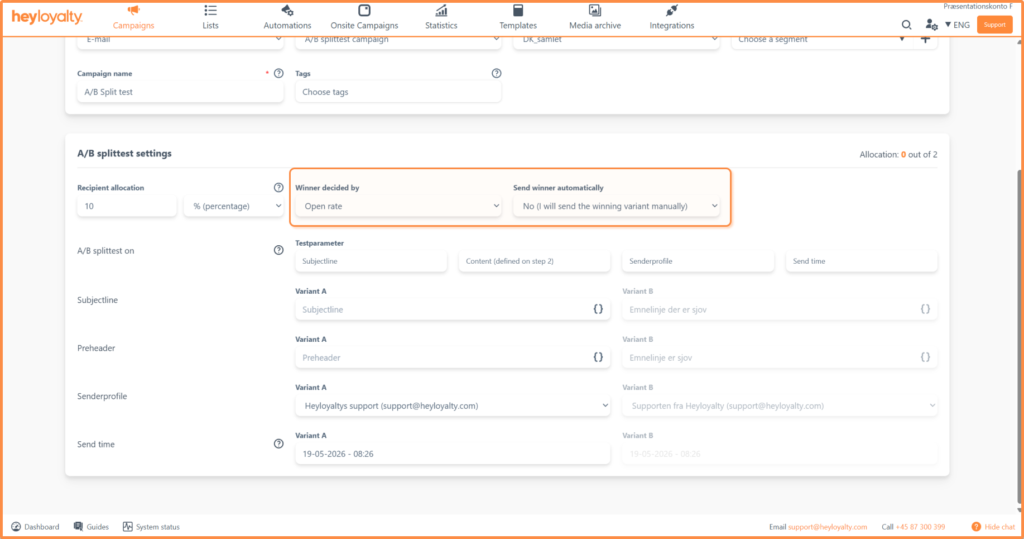
You also need to consider the following settings:
- Winner criteria: Choose whether to determine the winner based on highest open rate or most clicks.
- Send winner: Choose whether to send the winner version automatically or manually.
- Perform AB split test on: Select test parameter. Test on: Subject line, content, sender or send time. You can select multiple test parameters at the same time.
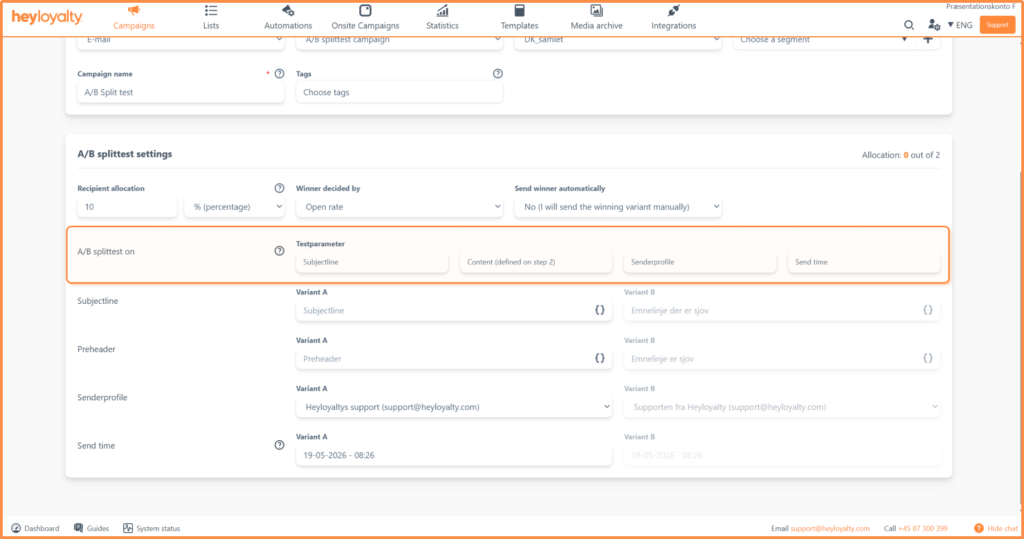
- Subject line: The header the recipient sees in their email client. If you are testing on subject line, you need to enter both an A and B variant.
- Preheader: The text that appears below the subject line in the mail client. You cannot do A/B testing on the preheader.
- Sender: The sender the recipient sees in their mail client. If you test on sender, you need to choose a sender for both the A and B variant.

- Broadcast time: Select when to broadcast the campaign. If you are testing on broadcast time, you need to select a time for both the A and B variant.
- Winner send time: If you choose to send the winner automatically, you need to specify when to send the winner version.
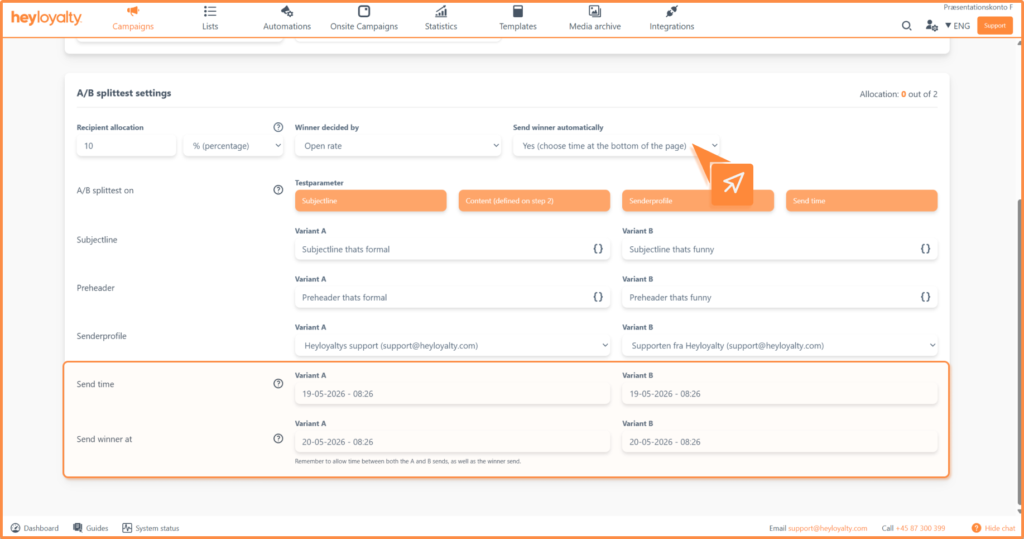
Once the settings are set, you can scroll to the top and click Next to set up the campaign.
Test content – Create A and B variant
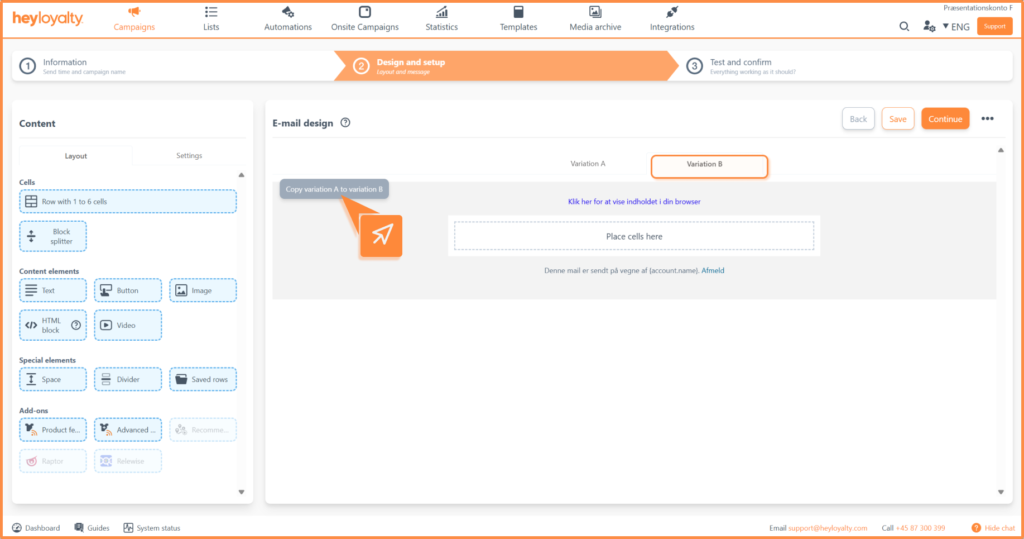
If you choose to test on Content, you need to create two versions of the campaign in Step 2. If you are not testing on content, you can skip this section.
Versions A and B are created in the same way as a regular campaign. When you get to Step 2, variant A is shown first. To edit variant B, switch the variant here:

If the content is almost identical in the two variants, you can copy the content from variant A to variant B. To do this, go to Variant B and click Copy variant A to variant B.
Manual broadcast of winning variant
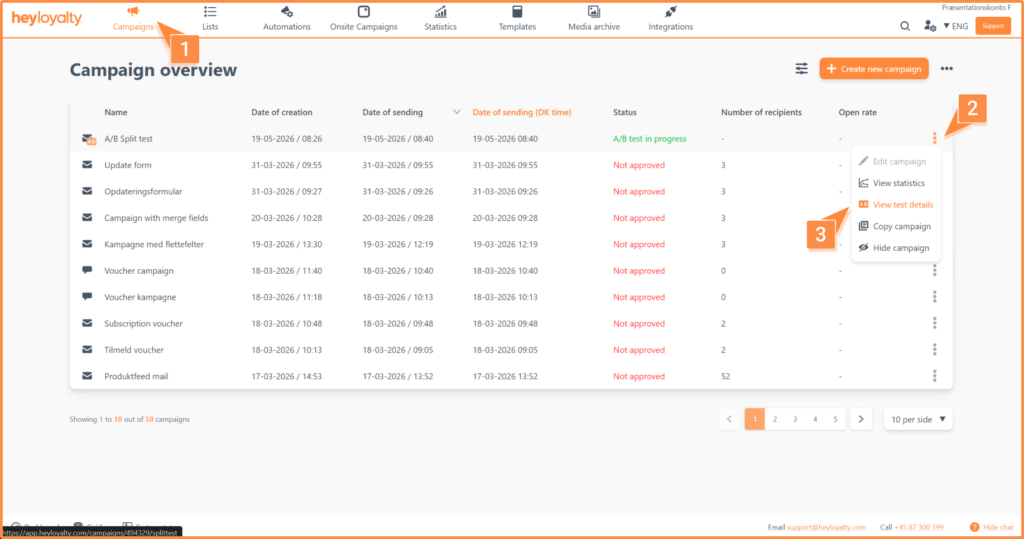
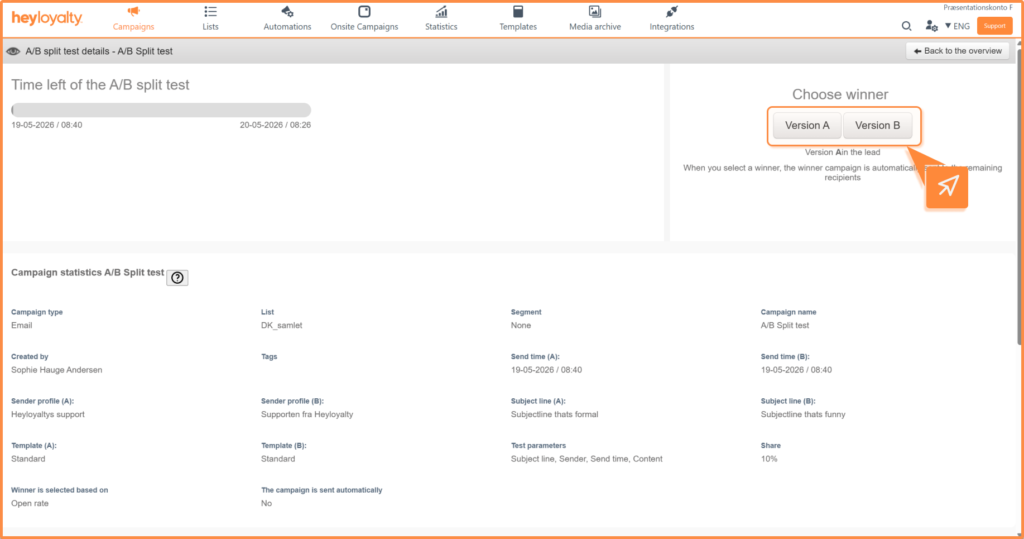
If you choose to send the winner manually, you must select the winner version yourself after the campaign has been sent. To do this, go to: Campaigns → click on the three dots next to the A/B split test → See test details
Here you choose the winner by clicking on either Variant A or Variant B.
Find the statistics
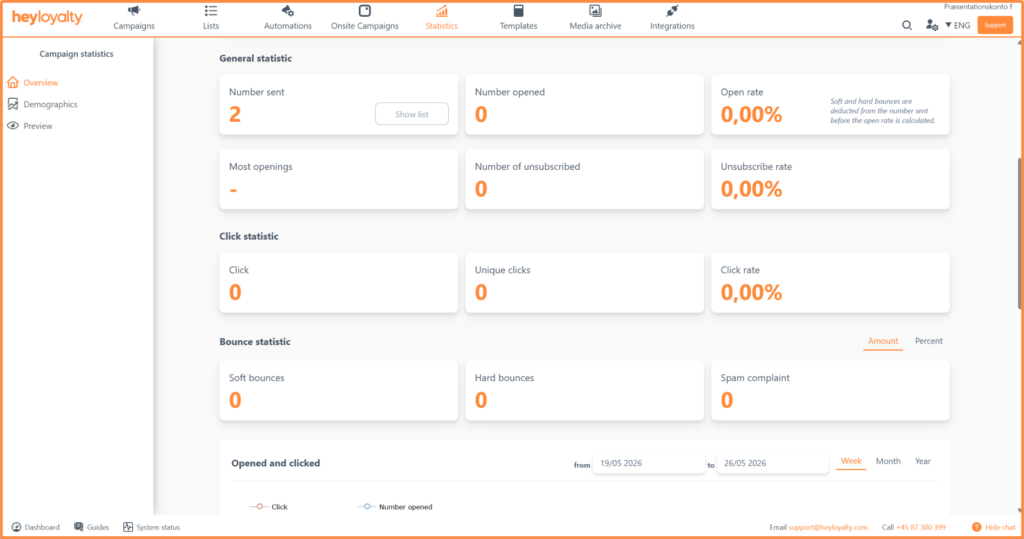
To see the general statistics for the entire A/B split test, such as how many recipients the campaign was sent to, open rate and click rate, click the three dots next to the campaign and select Statistics.
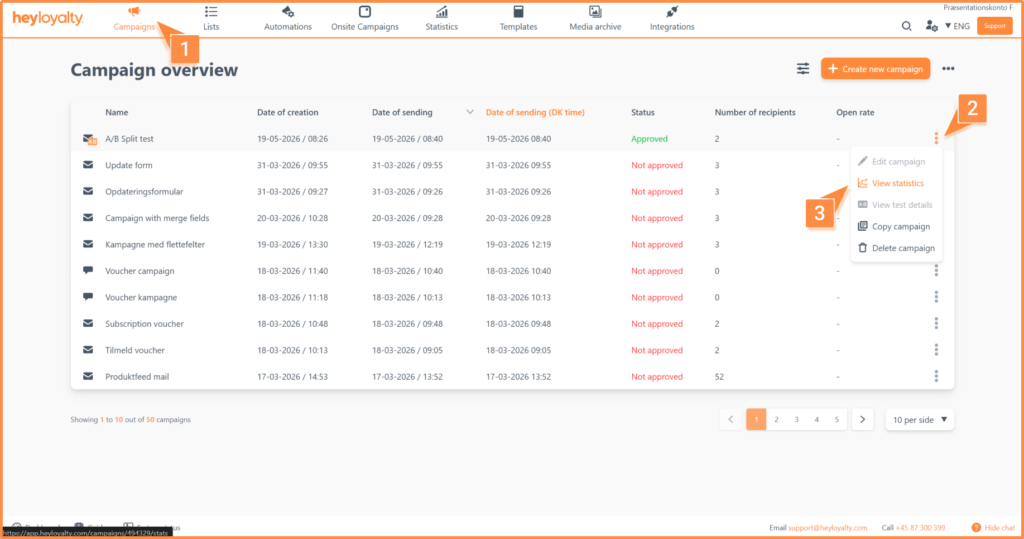
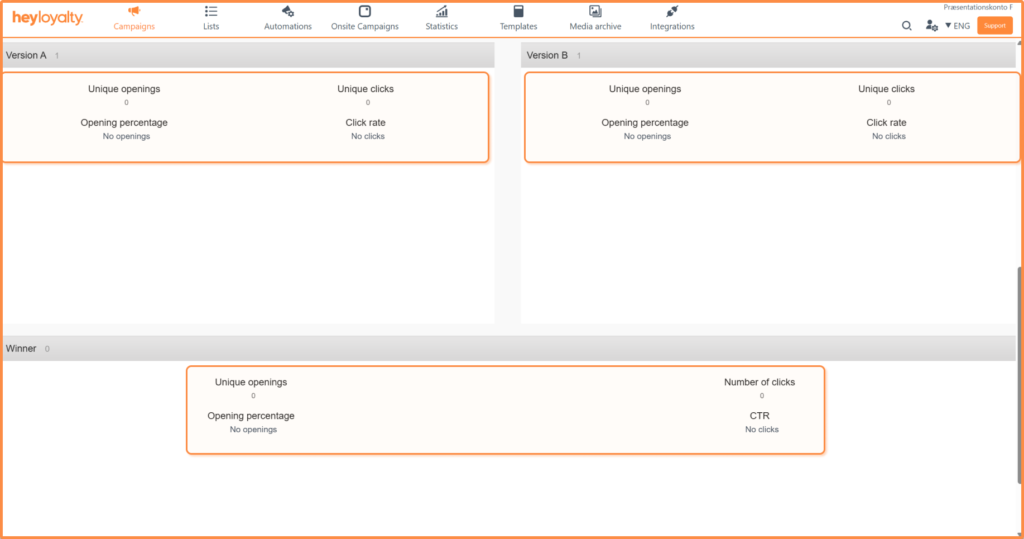
To see test details for the A and B variants that were sent out, click on the three dots next to the campaign and select View test details. Here you can see: how the two versions performed and which version won.
You are now ready to test
You have now learned how to set up an A/B split test in Heyloyalty, choose the test parameter and find the statistics afterwards. For example, start by testing two different subject lines on your next newsletter and you’ll quickly gain insight into what captures your recipients best.
The more you test, the sharper your campaigns will be. Have fun with your next split test!