
With an embedded update form, you can let contacts edit their own information directly from your website, online store, or member area. This is useful when contacts need to be able to update their own information, such as their name, email address, phone number, or other contact details.
To protect the contact’s data, the contact can only update the data through a password flow. The process for setting this up is described below.
How to Set Up an Embedded Update Form
Step 1: Prepare the list of required fields
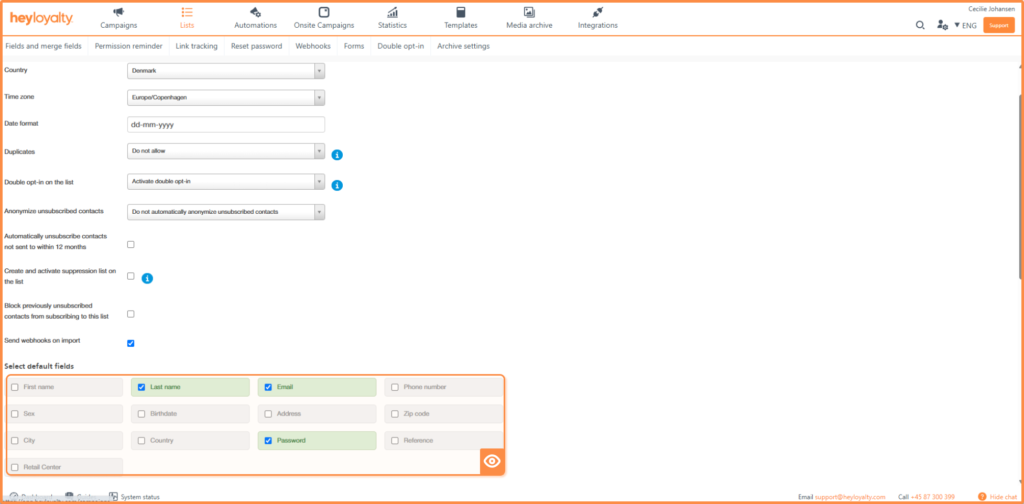
Start by making sure that the list to which the form will be linked contains the fields that the contact needs to be able to update.
Go to Lists → select the relevant list → Edit list. You’ll also need to add the password field to the list.
Step 2: Create the update form
Once the field has been created, you need to create an update form. If you have already created the update form, simply skip this step.
To create the form, go to the Form tab → Update. There, select Create Page.
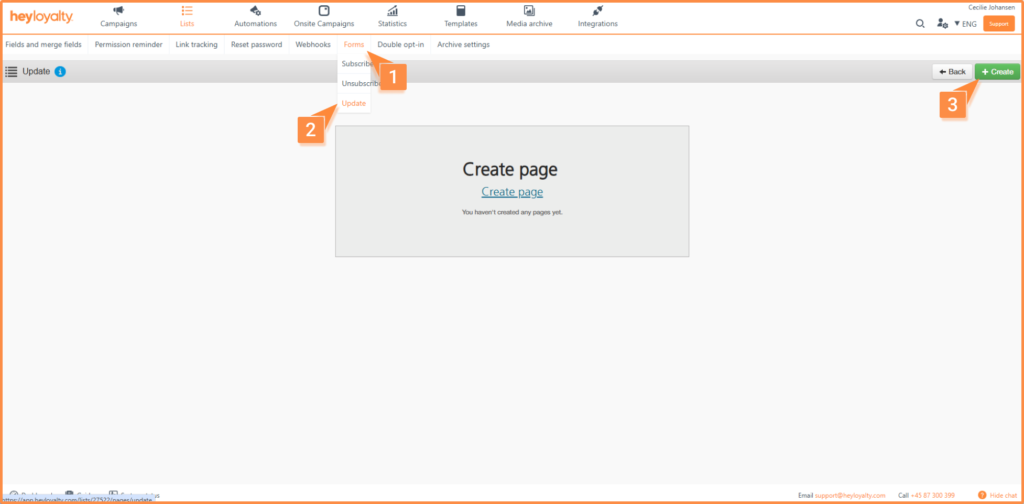
Here, you can choose between two options:
- Redirect to your own page
- Heyloyalty’s default configuration
When setting up redirection, enter a URL to your organization’s own password reset solution. This could be, for example, a self-service page or an intranet.
You can also choose to use Heyloyalty’s form template, which you can customize to match your brand’s visual identity.
You can customize elements such as:
- Logo
- Colors
- Script
- Button text
- Confirmation Message
- Error Messages
- Possible forwarding after submission
In addition, you can further customize the design using CSS if you need to make more specific visual adjustments.
After the form is submitted, the user can either be redirected to a page of their choice or see a confirmation message displayed directly on the page.
Once you have created the update form, click Save.
Step 4: Embed the form on the website
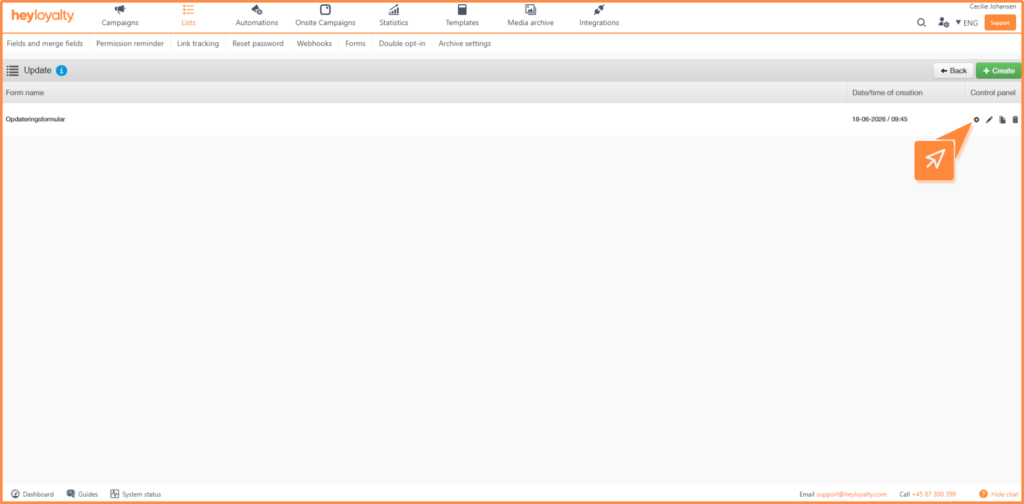
Once the form has been created and customized, you’ll need to retrieve the link or iframe used to display the form on your website.
To find this, go to Edit List → Form → Update. Here, click the gear icon to copy the link/iframe.
Step 5: Set up a workflow for logging in or resetting a password
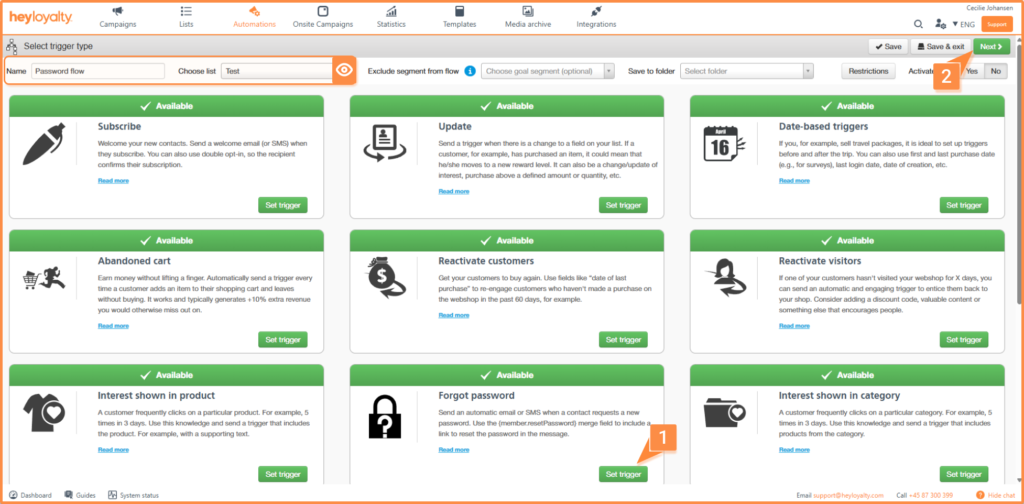
To log in to the update form, the contact must click “Forgot Password” and enter either their email address or phone number. When the user does this, an automation flow is triggered. That flow needs to be set up now.
Go to Automation and create a new flow. Here, select the “password” trigger and click Next.
Now you need to set up the flow, and you do that by clicking the plus sign. You need to choose whether to send an email or a text message when someone clicks “New Password.”
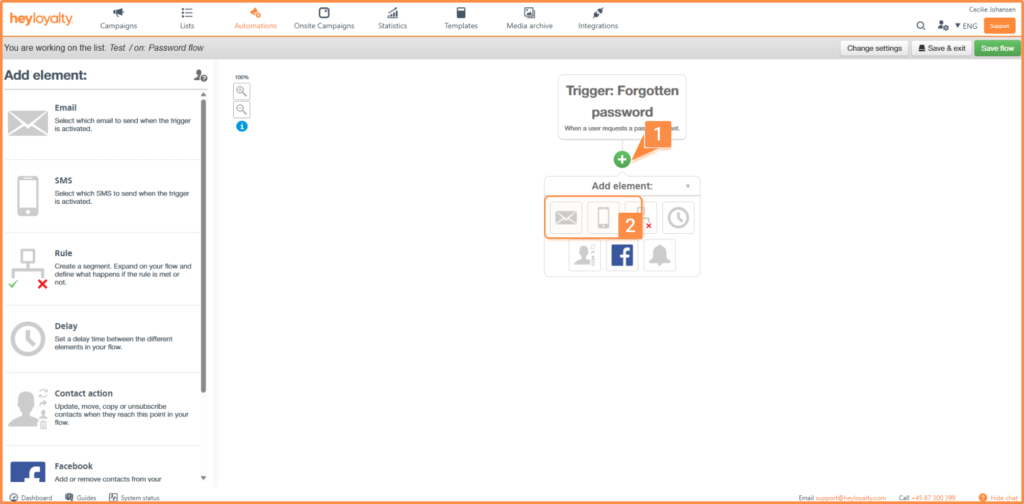
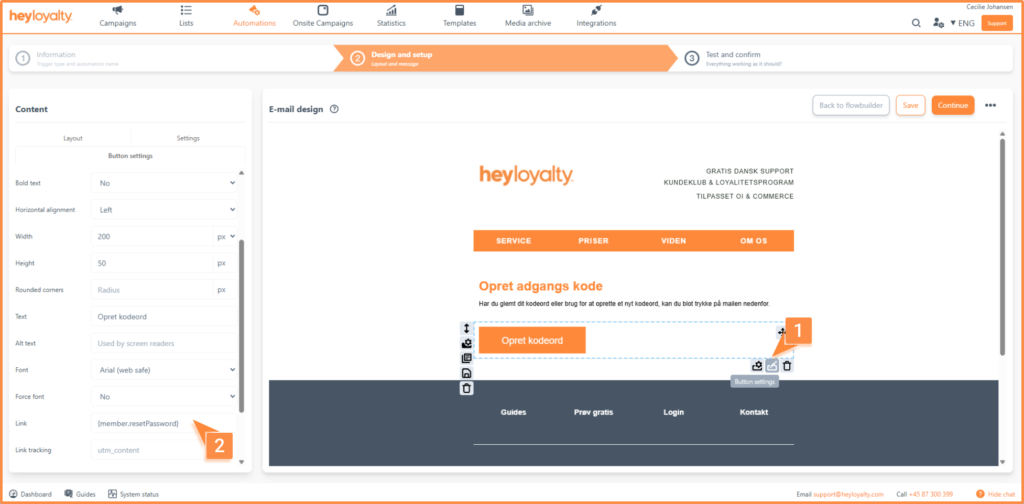
To link to the page where the user can change their password, insert the merge field {member.resetPassword}. You can add the merge field as a link either to text or to a button. If you want to use it on a button, insert the merge field as a link in the button’s settings.
If you’re setting up an SMS, simply insert the merge field: {member.resetPassword}
Once you’ve finished setting up the content, you can save the email and save the entire flow. Remember to activate the flow when you’re ready to use your update form.
Step 6: Customize the password reset page
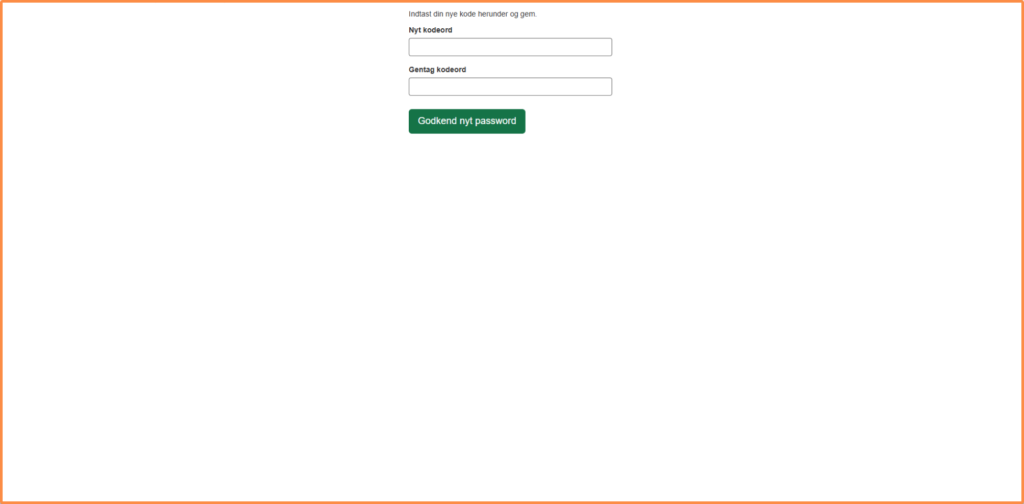
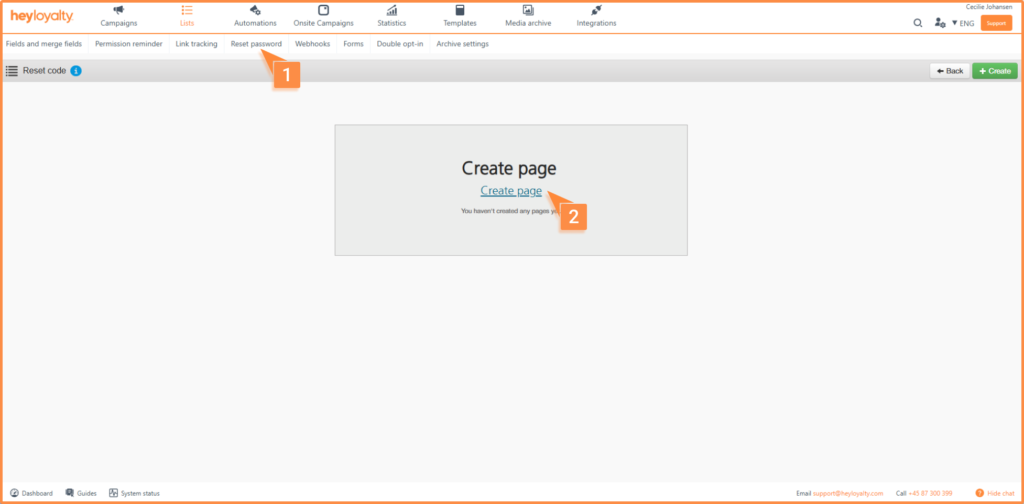
If you want to edit the page above, you can customize it in Heyloyalty. To do this, go to the list overview → Edit list, find the Reset Code tab, and click Create Page.
Customize the page with relevant text, colors, and a logo if desired. Briefly explain what the contact should do. Finally, click “Save.”
Step 7: Test the entire user journey
Before putting the update form into use, you should test the entire process from the contact’s perspective.
Tests include, among others:
- Access to the form: Can the contact open the embedded form from the website?
- Username or password: Does the password reset or creation work? If you don’t receive an email with a password reset link, it’s because the workflow isn’t enabled.
- Fields: Can the contact only view and edit the desired fields?
- Save Action: Are the changes being saved correctly to the contact profile?
- Confirmation: Does the contact receive a clear message after the update?
- Mobile View: Does the form work on mobile, tablet, and desktop?
Feel free to create a test contact so you can walk through the entire process without changing the information for a real contact.
Recommendations for Security and Data Quality
When contacts can edit their own information, it is important to consider both user-friendliness and data security when setting up the system.
Follow these recommendations:
- Show only the fields that the contact should be able to change
- Provide clear help text next to fields that cannot be misunderstood
- Use consent checkboxes correctly if the contact can change permissions
- Test the form when fields in the list are changed
- Ensure that internal processes allow contacts to update their own data
You’ve set that up now
You have now created an update form that can be embedded on your website or self-service portal. Contacts can use the form to update their information themselves, and access can be protected with a login or password flow.
This makes it easier to keep contact information up to date and also provides the contact with a simple way to manage their own information.
Hvis du mangler information eller hjælp, som du ikke finder her på guide sitet, er du altid velkommen til at kontakte vores support!
support@heyloyalty.com / tlf. 87 300 399