
You can now update the value of list fields directly in Heyloyalty for multiple contacts at once.
This makes it easy to change data on selected contacts without exporting, correcting and importing the list again.
In this guide you will learn how to select contacts, choose a field, insert a new value and confirm the update.
Before you get started
Make sure you know:
- What value to update the field to
- Which contacts to update
- Which field to change. If the field is not in the list, create a new field.
Read here how to create fields in the list.
Step 1: Find contacts to update
Go to the list where the contacts are located. Here you will see an overview of the contacts in the list. Start by finding the contacts that need a field updated. Check the contacts you want to update.
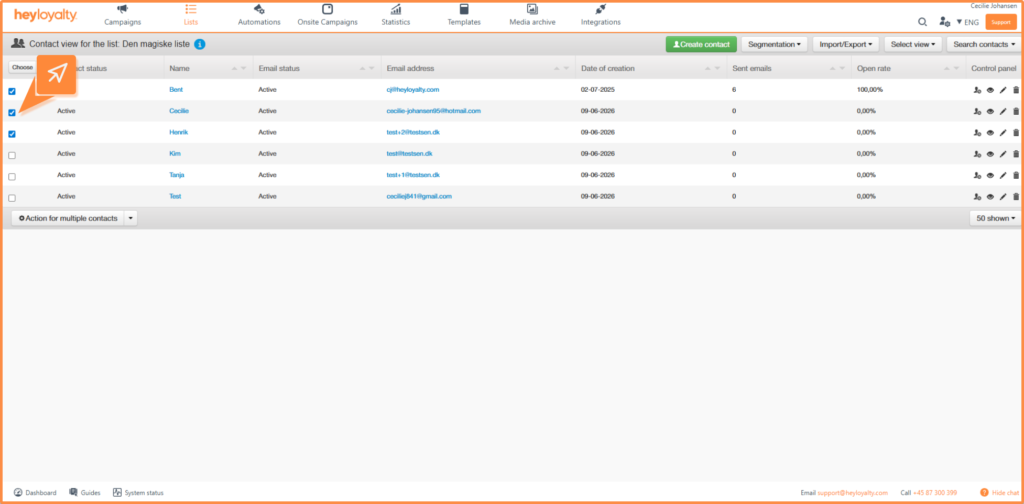
If you want all contacts in the list to have their data updated, you can click Select and then select All.

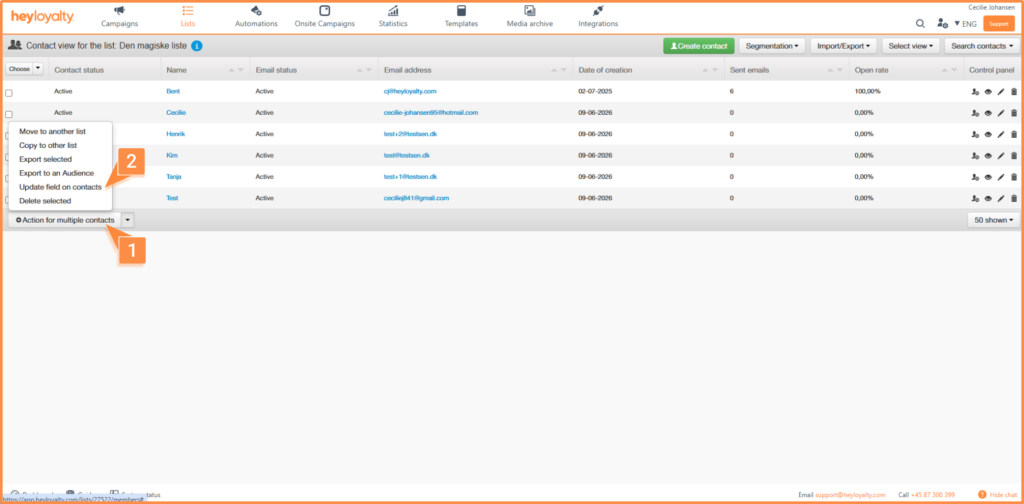
Step 2: Choose the option to update the contacts
Once you have selected the relevant contacts, scroll down to the bottom of the page. Click on Action for more contacts. Then select Update field on contacts.
Step 3: Set up the field update
You will now have the option to select which field in the list you want to update. Click on the field selector and select the desired field.
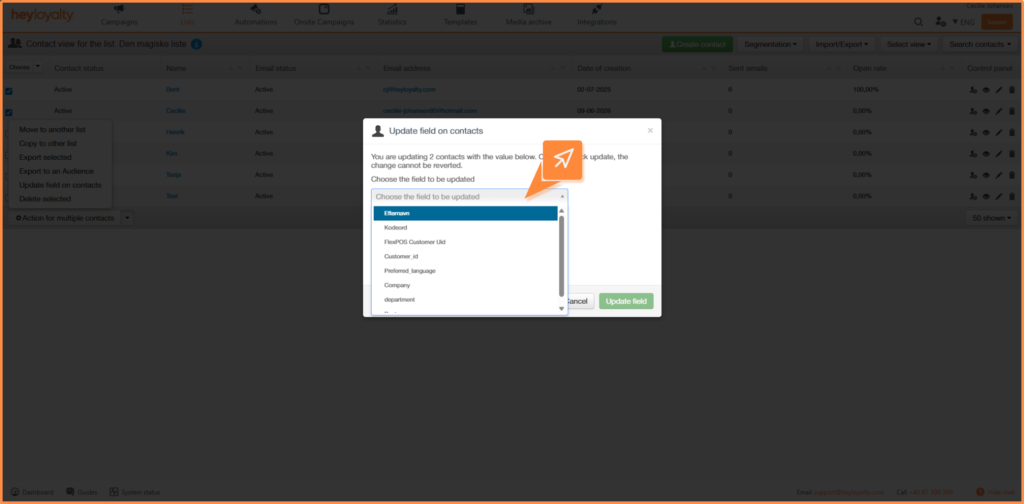
After selecting the field, you need to enter the value you want the field to change to. The value you can insert depends on the field type.
Examples:
- Text field: Enter the text to be saved on the switch
- Number field: Insert the number to update the field with
- Date field: Select or enter the date to save
- Single selection option: Select one of the values already set up in the field
- Multi-select option: Select multiple values already set up in the field
Before updating the field, you can choose how Heyloyalty should handle the update in relation to automations and integrations.
You can take a stand:
- Send update flow: Enable this if you want the update to be able to start automations based on list field updates on a contact.
- Send webhooks: Enable this if you want the change to be sent to integrations that use webhooks. If you don’t use integrations with webhooks, you can disregard the Send webhooks option.
Step 7: Update the field
Once you have set the settings for the last step, you can click Update field.
Heyloyalty will now ask you to confirm the change.
Only confirm if:
- The correct switches are marked
- The correct field is selected
- The new value is correct
- Send update flow and Send webhooks settings are fit for purpose
When you confirm, Heyloyalty updates the field on the selected contacts.
Log in to update fields
If you want to see which fields have been updated in the list, you can do so in the account settings and select Logs.
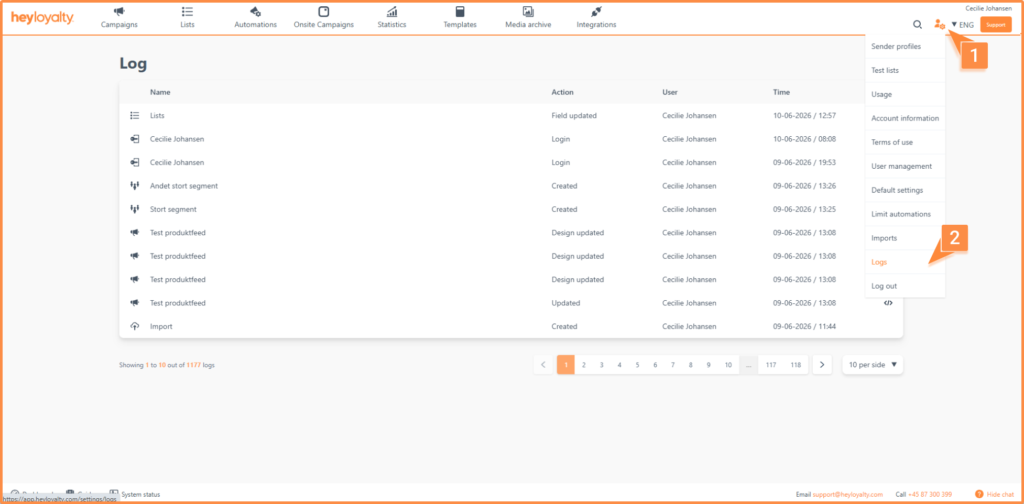
You will see logs of updates to fields in the list by finding the list icon and the action called field updated. If you want to see which field has been updated you can click on the icon: </ >.
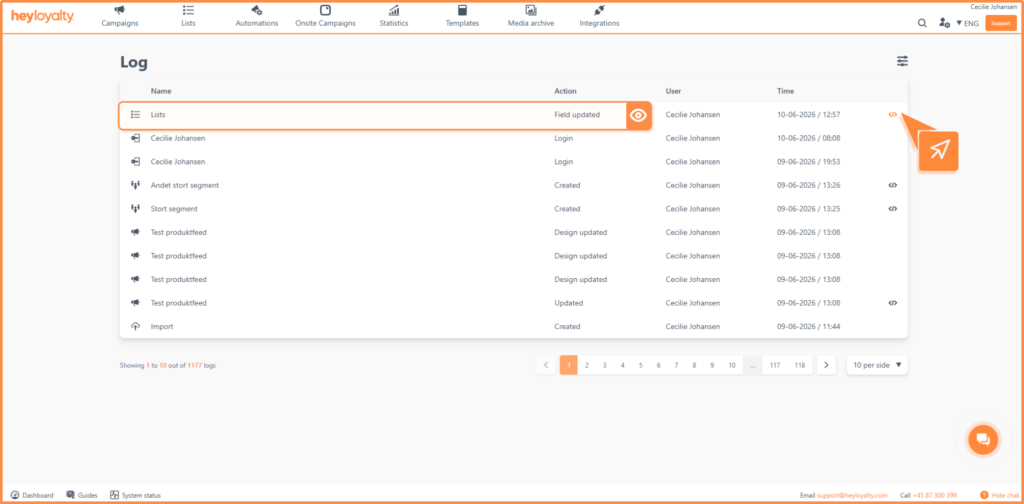
Here you get info on which field has changed, what value it has changed to and count means how many contacts have been updated.
The list field is now updated
You have now updated a list field on multiple contacts directly in Heyloyalty.
The feature can be used when you want to quickly change contact data on a single field in the list. You can choose to do it on selected contacts or on the entire list.
Always remember to check the change thoroughly before confirming. Once the field is updated on the contacts, Heyloyalty cannot automatically roll back the change.
Hvis du mangler information eller hjælp, som du ikke finder her på guide sitet, er du altid velkommen til at kontakte vores support!
support@heyloyalty.com / tlf. 87 300 399