
This guide will help you set up the integration between Magento 2.X and Heyloyalty so you can work data-driven with your email marketing and marketing automation.
You’ll be guided step-by-step through the entire process – from initial preparations and setup requirements in both Magento and Heyloyalty, to how to make the most of the data provided by the integration.
Along the way, you’ll also get answers to the most common questions so you know what to expect in terms of time, technical needs and possibilities with the integration.
The goal is to give you a solid foundation so you can quickly and efficiently start using your webshop data to create more relevant communication, better customer experiences and stronger loyalty among your customers.
The value of integration
Build stronger loyalty
When you work with marketing automation and personalized messaging, you can meet your customers where they are. You can send content that actually feels relevant to the individual – and that’s what creates a stronger relationship and increases loyalty over time.
Deliver a better customer experience
Imagine your customers always receiving the right messages at the right time. By using real-time data, you can send relevant offers, inspiration and information that matches their interests – making the whole experience with your online store easier and more valuable.
Speak directly to your customers
You no longer need to communicate broadly and generically. With advanced segmentation, you can target your messages so they feel personal and relevant – based on your customers’ preferences, behaviors and needs.
Dropout prediction and prevention
You’ll be able to spot customers who are slipping away before they do. By analyzing their behavior, you can target campaigns and incentives to retain them and strengthen the relationship.
Work smarter – not harder
When your marketing processes run automatically, you free up time and resources. At the same time, you ensure that your customers still receive personalized and relevant messages – without you having to do everything manually.
Turn your visitors into loyal customers
With the 2-way integration between Heyloyalty and Magento, you get the best of both worlds. You can work data-driven with email marketing and marketing automation – and build stronger relationships with your customers based on their actual behavior in your webshop.
Before you begin
To make it easier for you, we recommend that you read the frequently asked questions and find the various documents, IDs, login information, etc. that you will need for the setup. See more below.
Frequently Asked Questions
Do I need a developer?
Probably yes. There are four steps to install the app via Magento’s normal composer setup. Follow these. Scroll down and find them here: Start by following Magento’s installation guide for installing an app.
How long does it take to finish setting up the integration?
10-30 minutes.
Does the integration retrieve backward data?
Not automatically, but you can have the integration pull purchase data from the last 24 months.
Do I need access to other systems?
You need access to Heyloyalty – and your Heyloyalty account must be active.
You need access to the Magento backend.
Which data is being imported?
Read the Fields in the integration section at the bottom of this page for the full overview.
Can I segment on data coming through the integration?
Yes. Any data that comes through the integration can be used to segment your future communication. You can also use this data to start and stop your flows.
What you need to set up the integration
Do I need a developer? It can be either no or yes. It depends if you can install a Magento module yourself?
Can I set up the integration in Heyloyalty myself? Yes, you can.
You should have Heyloyalty and the Magento backend open in separate tabs in your browser. In Heyloyalty, you will need the following
- Overview of the list you want to integrate with
- Tracking integration on the aforementioned list
- API key
- API secret
The integration operates via Magento’s API and Heyloyalty’s tracking database. Red more about Tracking.
Setting up the integration
With the above preparation, you are now ready to set up the integration between Magento and Heyloyalty.
Start by following Magento’s installation wizard for installing an app:
How to Install:
Please ensure you are using correct access keys
Paste the access keys in your auth.json file inside your project
Use the “composer require
<module_name>Use the “
You can see the list of versions in the selector below the extension module name
For detailed instructions, see DevDocs
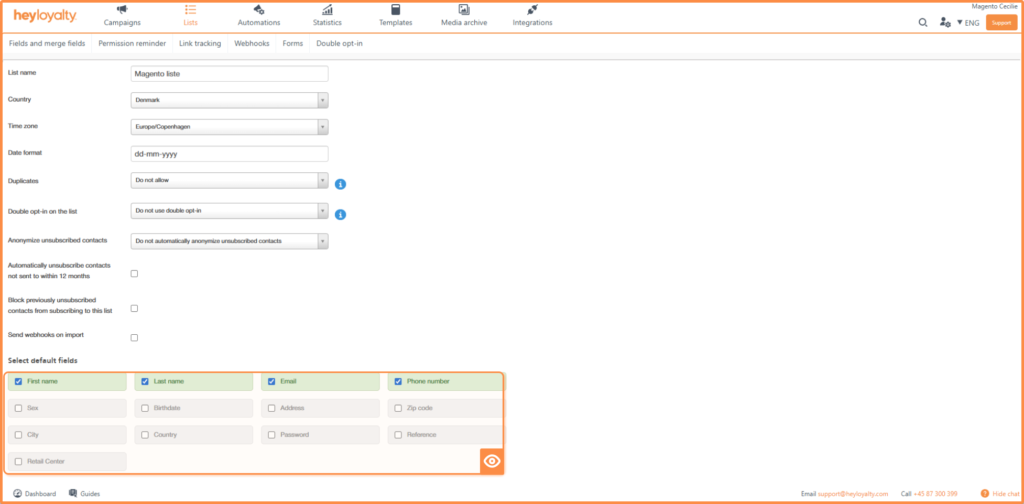
Overview of the list in Heyloyalty
Review your list by clicking Lists –> ⁝ –> Edit list
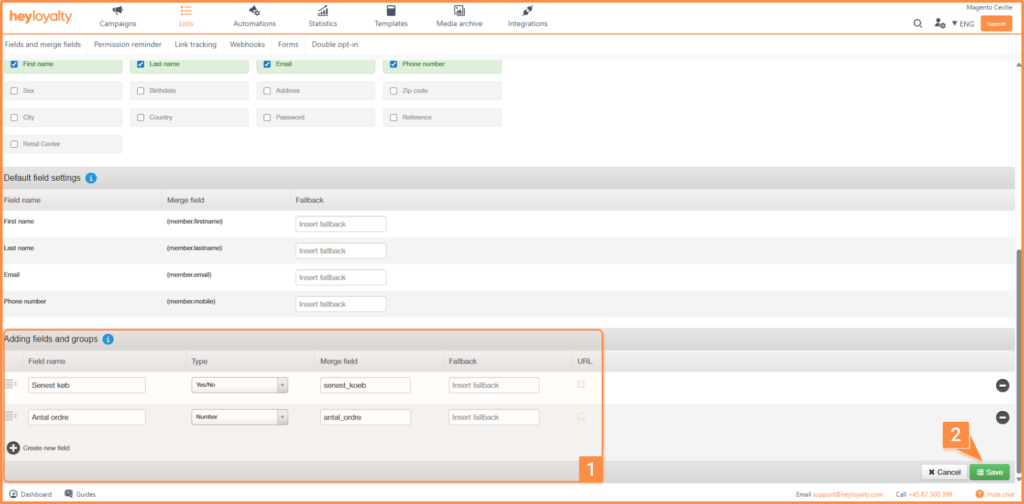
Review if you are satisfied with the selected default fields, or if any fields need to be added or removed. Then scroll further down and consider the additions of fields and groups that may be on the list.
Tracking integration
Set up Tracking by clicking on Integrations –> List Integrations –> Tracking –> Setup Integration –> Create new Tracking
Fill in the fields. Make sure to connect a product feed. The number of visits to the category and the number of days the visits are over are important to consider as they affect when an automation flow like category interest will trigger. A rule of thumb – which may be more or less good depending on your guests’ typical purchasing patterns and frequencies – is to set the Number of visits per category to three and the Number of days visits are over to seven.
Session time should be a number, and it should be the same as in your script. Typically, we recommend 45 minutes, so if you follow that recommendation, you should write 45 in that field.
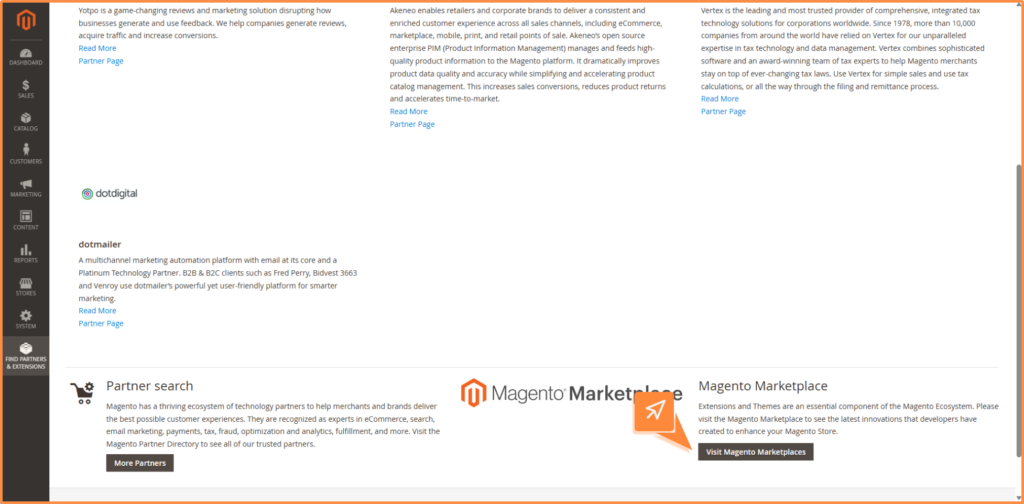
Install Heyloyalty as an app from the Magento Marketplace
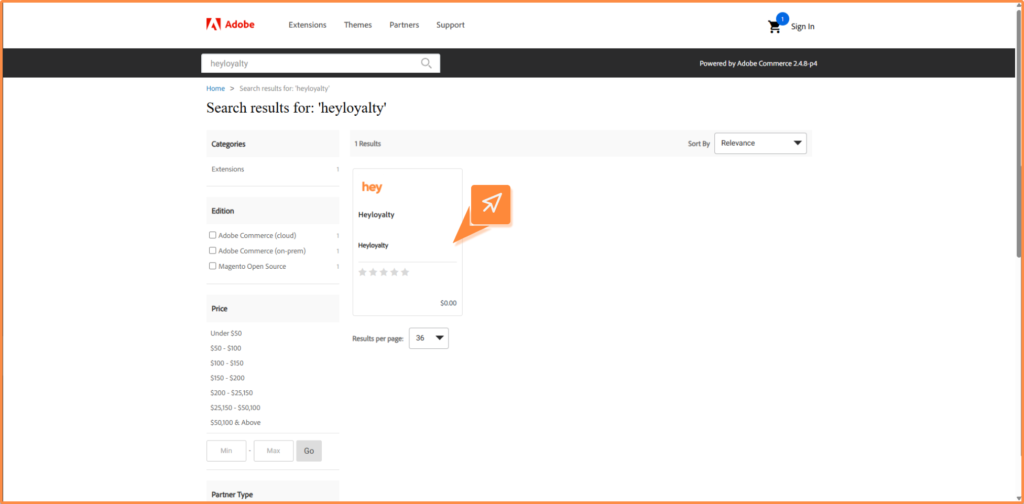
Find the Heyloyalty app in the Magento Marketplace. Log in to Magento –> Find partners & extensions –> scroll down to the bottom and click Visit Magento Marketplaces –> search for Heyloyalty.
Click on the Heyloyalty app and add the app to the basket and complete the checkout.
After you have ‘purchased’ the app, click on Install.
Setting up the integration in Magento
Back to the backend in Magento, now click on Stores –> Settings –> Configuration –> Sales –> Heyloyalty
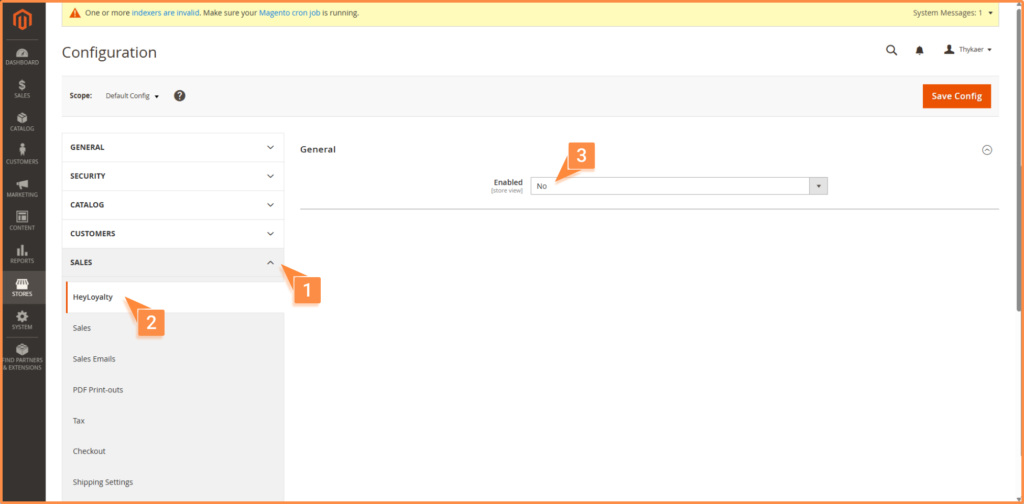
Here you change Enabled to Yes, which brings up more fields.
Fill in API Key and API Secret. You can find this info in Heyloyalty under the user icon –> account information. Here you will find this info.

Now click on Save Config.
You can then select your list in the List field.
Now, you need to map the fields from the list with the corresponding values in Magento. Click Add More for each field you want to folder. It’s up to you how much data from Magento you want to bring into Heyloyalty.
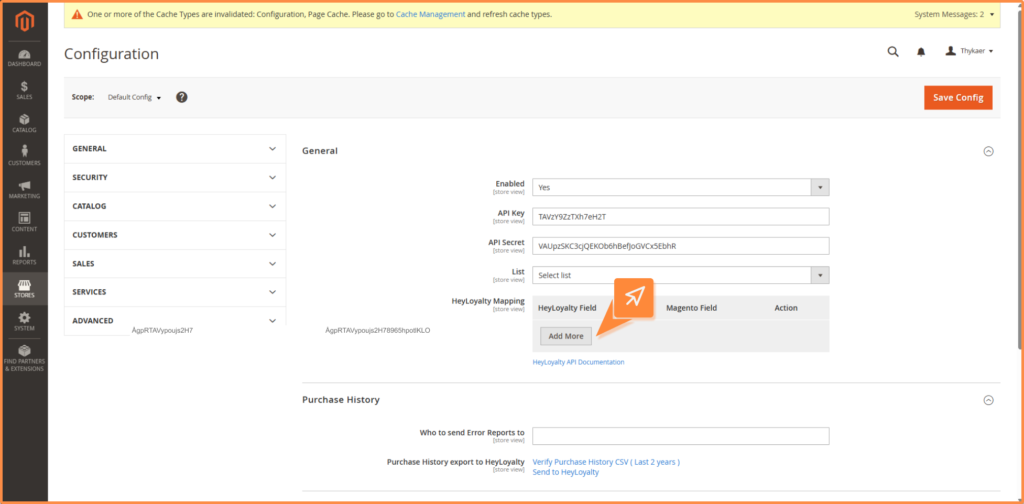
Once you have mapped the desired fields, click on Save Config.
To import data that you have collected historically, see the section Importing Backward Data.
General information about integration
Worth knowing about the integration
Once the integration is set up, you can send the last 24 months of purchase data from your Magento shop to Heyloyalty. Heyloyalty creates a contact when a contact is created in Magento.
- The contact is automatically updated in the Tracking database. This means that you can, among other things, segment on whether the contacts in Heyloyalty have purchased within the last seven days or not, have purchased for more than a given amount or have purchased more than a certain number of times, to name just a few of your options.
Importing historical data
To import backward data, you need to go into the backend of your Magento shop.
Click Stores –> Configuration –> Sales –> Heyloyalty
There are now four fields to consider:
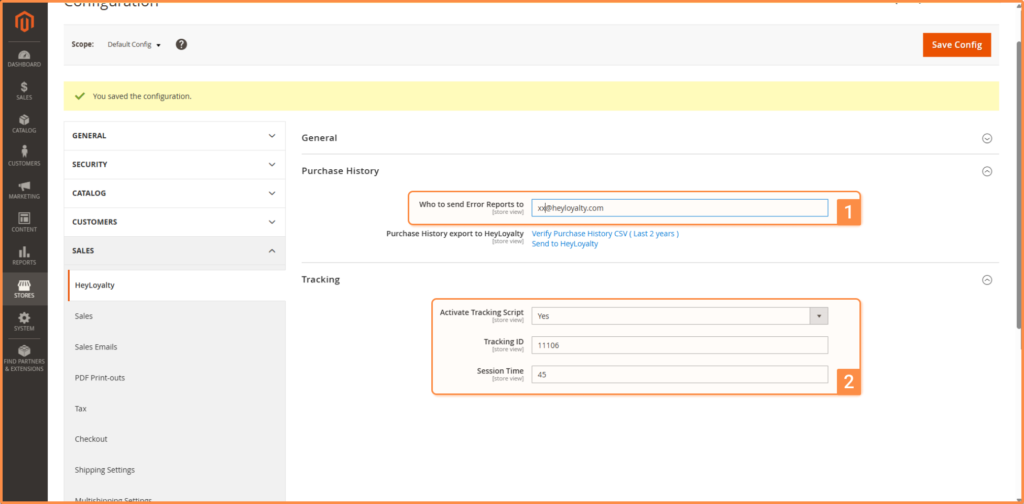
- Who to send Error Reports to
Should there be errors in the data transfer between Magento and Heyloyalty, it is this employee who will be notified via email.
- Activate Tracking Script
Should be left on Yes
- Tracking ID
Enter your five-digit tracking ID from Heyloyalty.
TIP: You can find this ID in Heyloyalty: Integrations –> List Integrations –> Tracking –> Edit Integration–> *Find your Tracking ID in the fourth column*
- Session Time
How long does it take for Magento and Heyloyalty to define the visitor’s session for being dead (and e.g. a lost cart flow starts). This number should be the same as in your Tracking list integration in Heyloyalty.
TIP: You can find this ID in Heyloyalty: Integrations –> List Integrations –>Tracking –>Edit Integration–>*Find your Session Time in the second column*
Once the above fields are filled in, click Save Config.
To start importing the backward data, just click Send to Heyloyalty next to Purchase History export to Heyloyalty.
Fields in the integration
All the fields you have in Magento on contacts can be mapped to Heyloyalty. You just need to make sure the field is created in the list in Heyloyalty, as we describe in the section: List overview.
If you have activated the tracking script in Magento, you will see in the Heyloyalty Activity feed that you get tracking data on purchase and behavioral data on your webshop. You can find the Activity feed under the Statistics menu item.
Get full value from your integration
Now that you’ve set up the integration, you have the foundation in place to work more data-driven with your marketing. This means you no longer have to guess – you can communicate based on your customers’ actual behavior and needs.
With Heyloyalty, you can turn your data into concrete actions: automated flows, personalized messages and targeted campaigns that create value for both you and your customers.
The sooner you get started, the sooner you can start strengthening relationships with your customers and drive better results for your online store.
So take the next step and start unlocking the full potential of your integration today.
Hvis du mangler information eller hjælp, som du ikke finder her på guide sitet, er du altid velkommen til at kontakte vores support!
support@heyloyalty.com / tlf. 87 300 399